Connecting you Xprinter to Mac
First ,download the driver for Mac and put it on the desktop
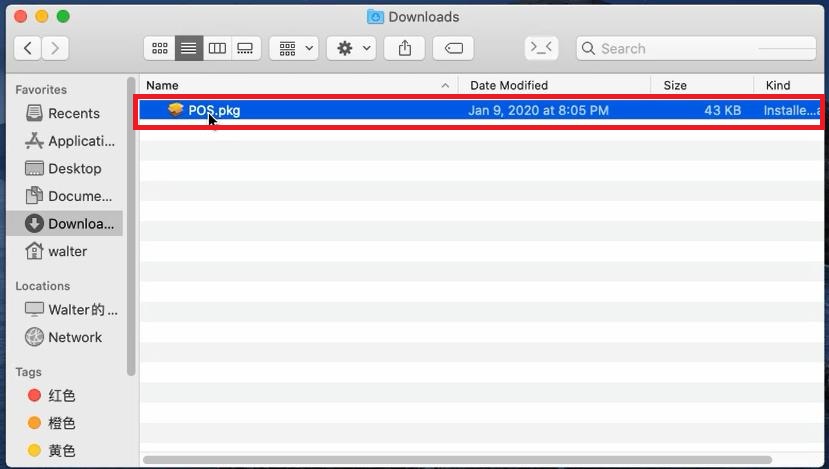
Click to start the installation, the process is almost automatical
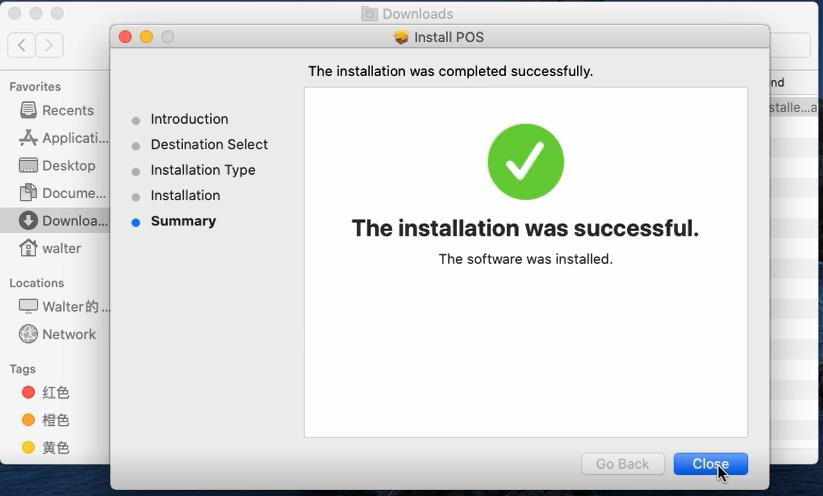
If you set a password on the Mac, you will be requested to enter the password before next installation steps
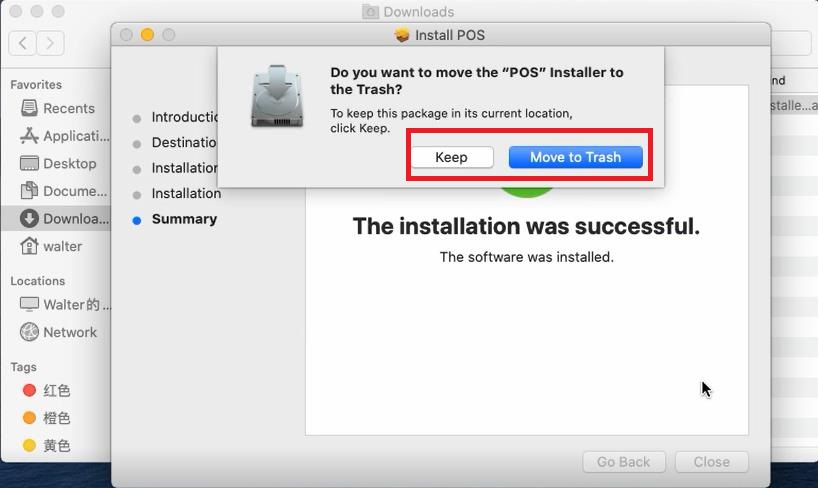
When the installation finished , you can select "Keeping the driver" or "Move to trash"
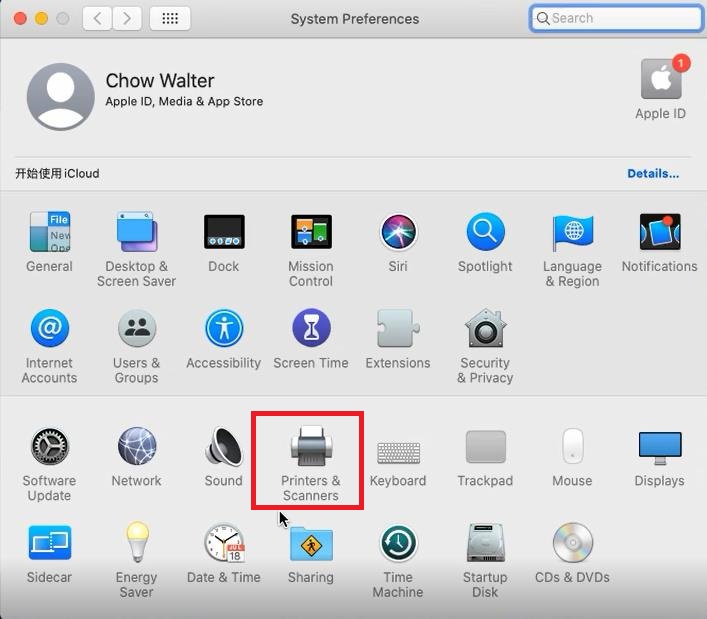
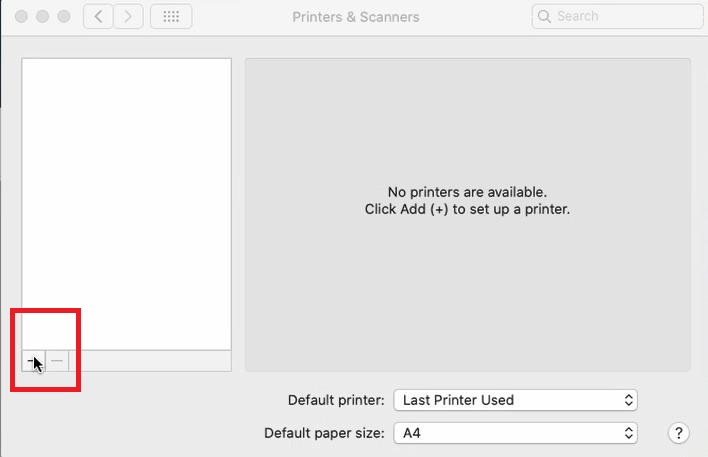
Then go to the Mac setting , slect the item "Printer and Scanner" and Click "+" to add the printer
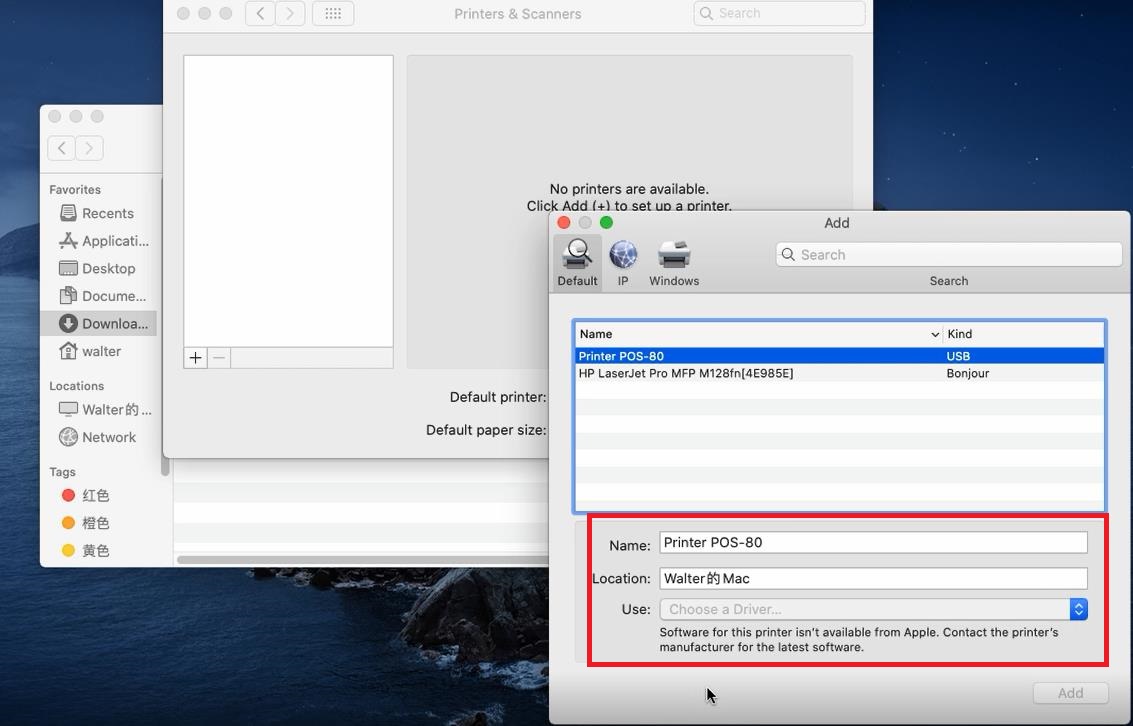
you will see the printer that you have connected to Mac : here is the "Printer POS 80" (Standing for our whole 80 mm receipt printer series)
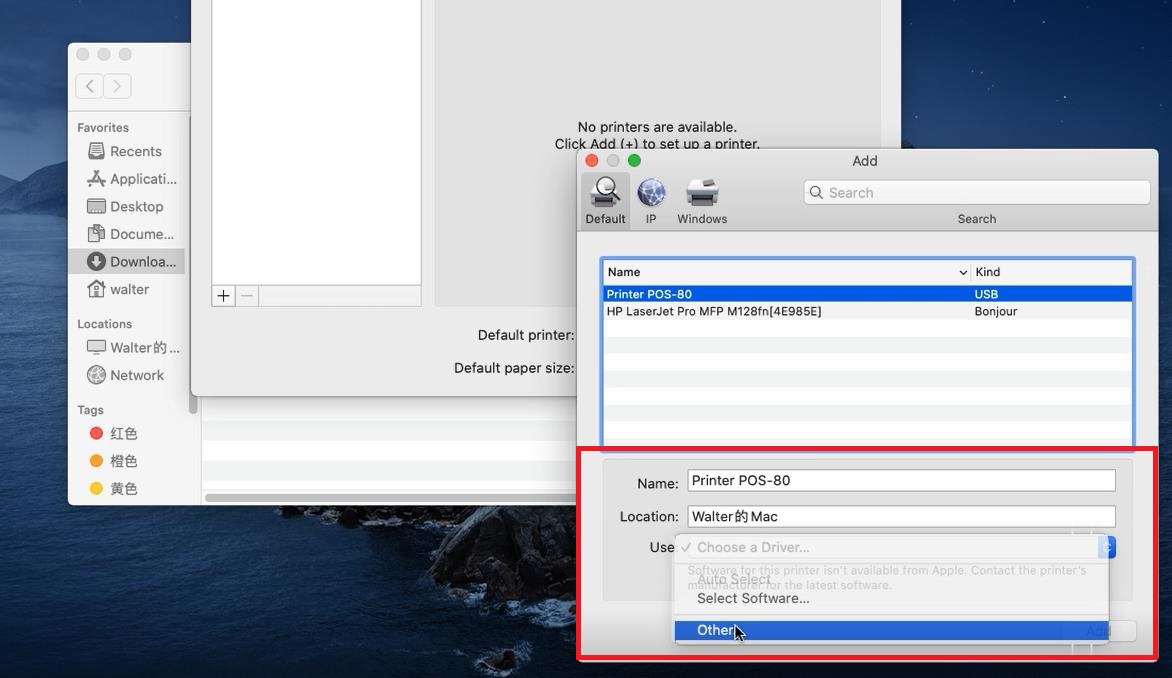
Select "Other" on the "USE" section
Then, there will be new "Windows" as below
Select "Printers" on the top section, and follow the below steps :
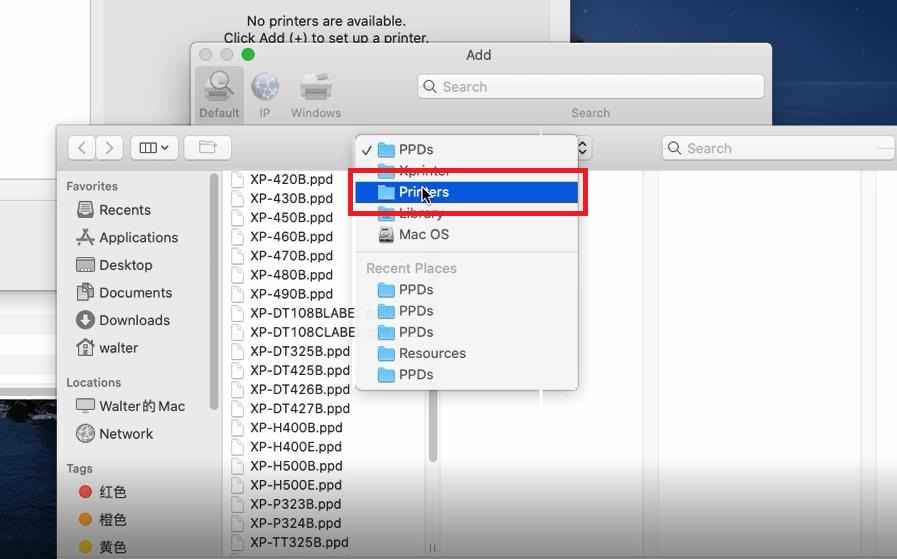
“Library” -- “Printers”--“POS”--“PPDs”--“POS-80”(if your printer is the 80mm series)
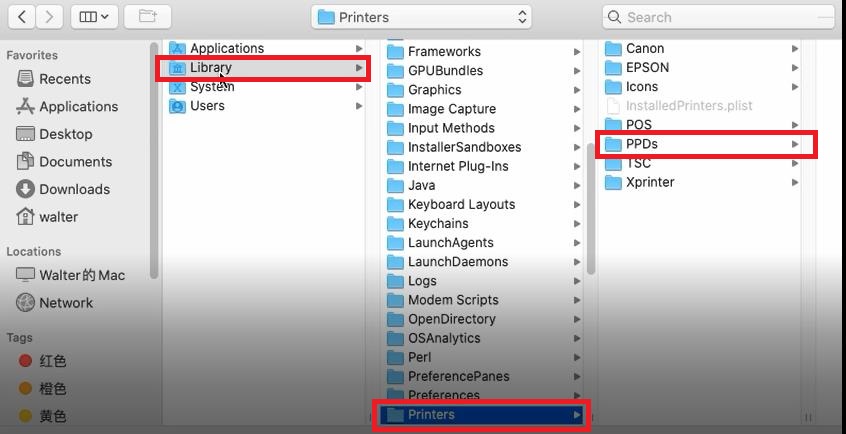
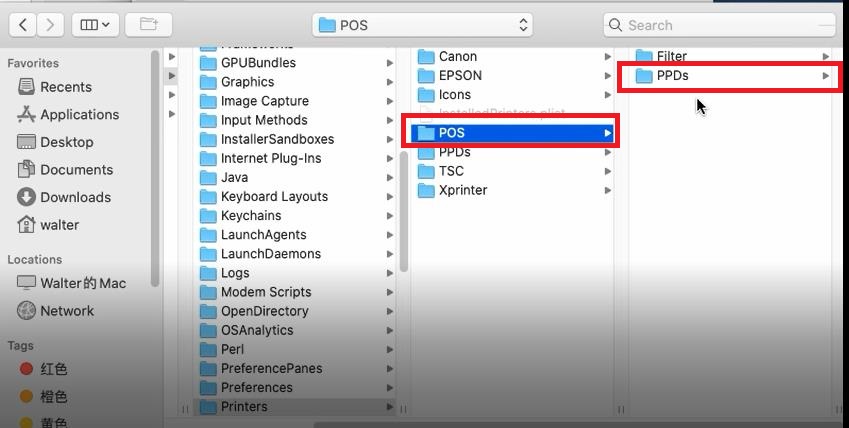
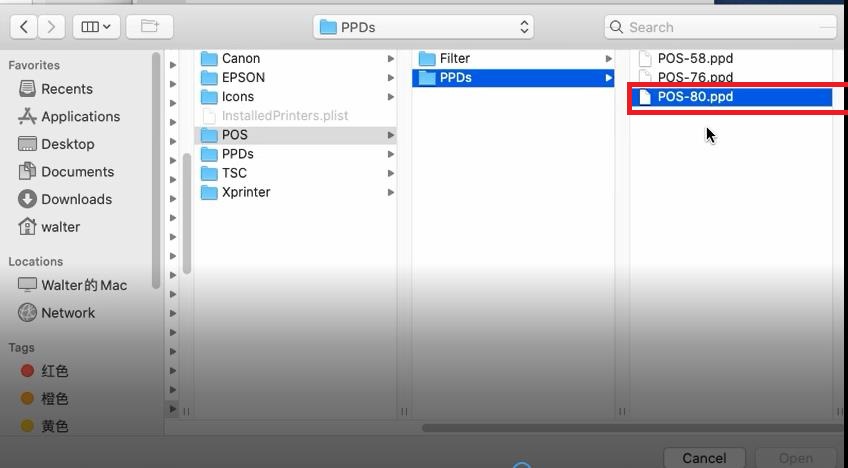
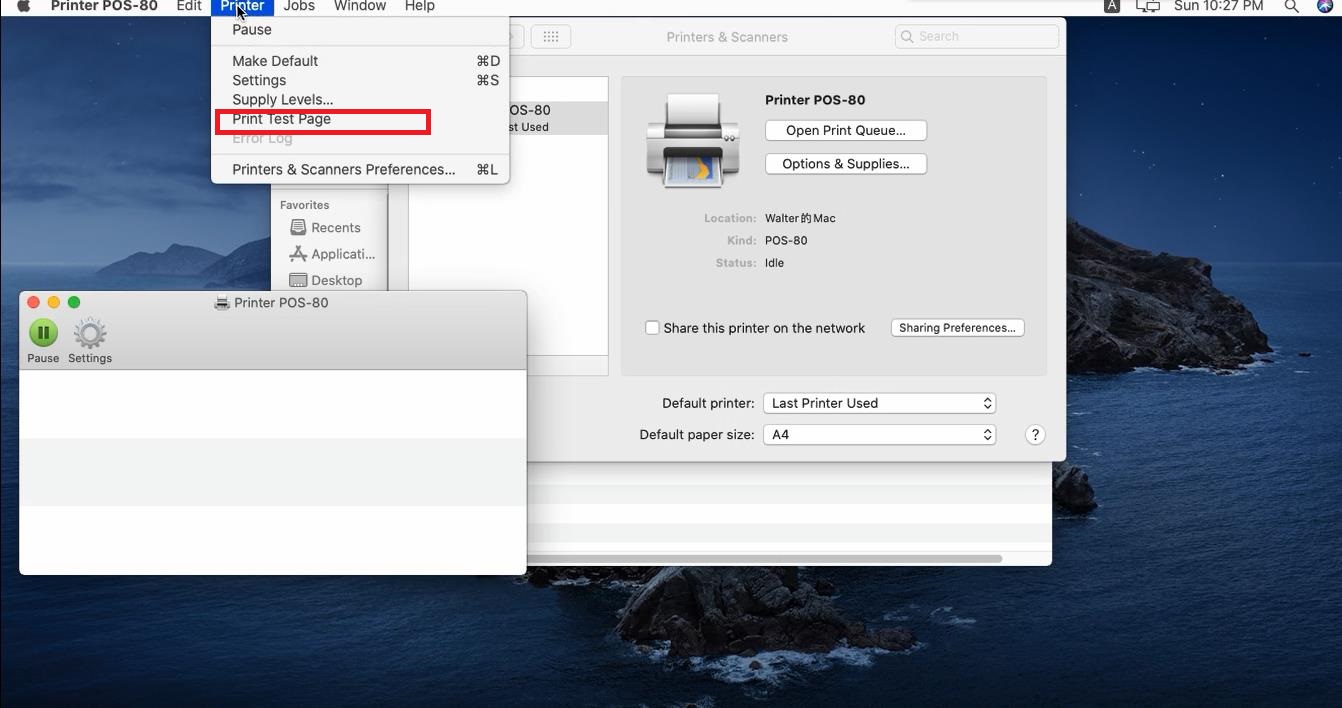
Then "Click" Open to add your printer, you will see the printer has been successfully added as shown below
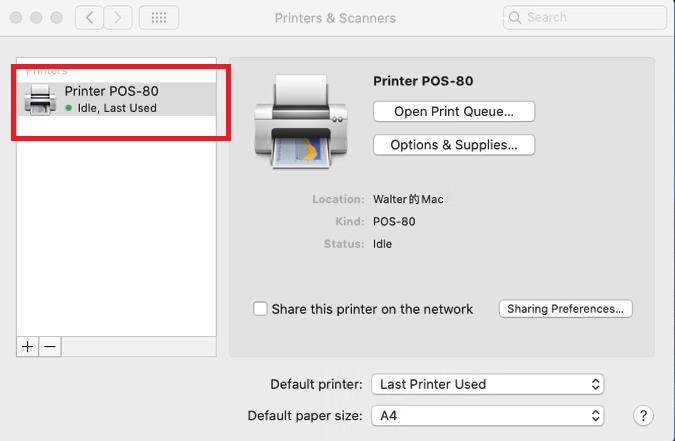
Slect the "Print Test Page" on the top drop-down menu to conduct a pagetest
Thank you for watching !
Copyright © 2026 Xprinter | All Rights Reserved
Hello, please leave your name and email here before chat online so that we won't miss your message and contact you smoothly.