pусский
  Português
  العربية
  Français
  Español
  (+86)-0756-3932978

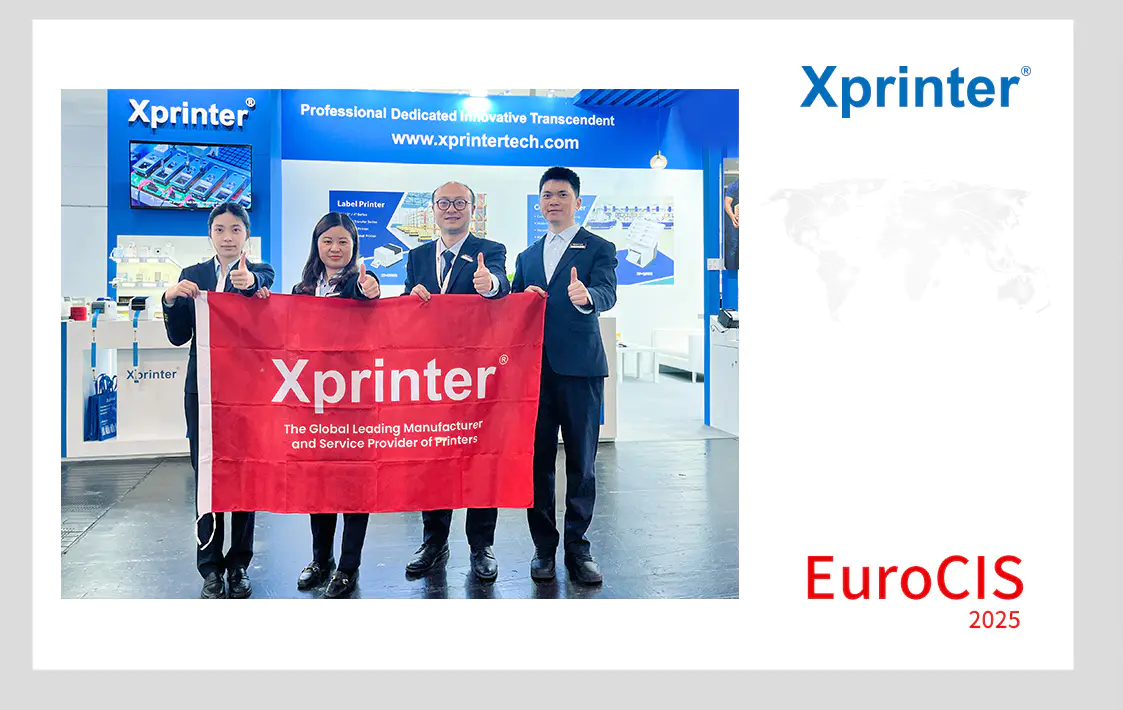
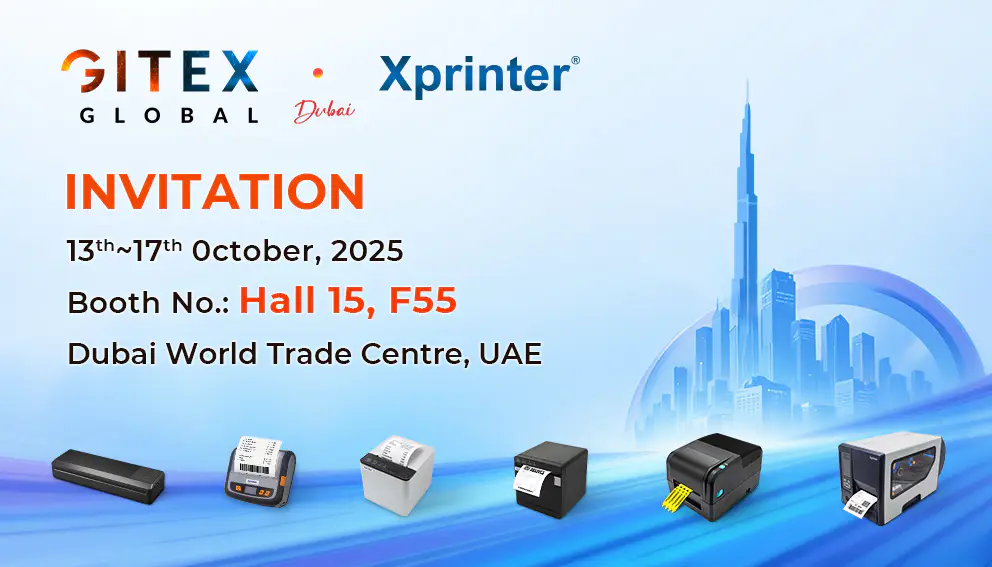
Guide to Install Label Printer Driver on Windows with USB Interface
dotter - huge arduino based dot matrix printer
by:Xprinter
2019-11-12
Hi, welcome to this structure :)
I\'m Nikodem Bartnik, an 18-year-old manufacturer.
Through my 4 years of manufacturing, I have done a lot of things, robots, equipment.
But the project is probably the largest in scale.
I think it\'s also well designed, and of course there\'s something else to improve on, but it\'s awesome for me.
I really like the project because of how it works and what it can produce (
I like this pixel/point like graphics)
But there is more in this project than just Dotter.
How I did it, how I came up with an idea and why failure was an important part of the project. Are you ready?
Warning there may be a lot worth reading in this structure, but don\'t worry about the video about it below (
Can also be found above)
: Start link of video!
If my project works, you might ask the story of why it failed?
Because there was no graffiti at the beginning.
I want to do something similar, but it\'s a lot more complicated --a 3D printer.
The biggest difference between the 3D printer I want to make and almost any other 3D printer is that it will use cheap 28BYJ-
You can buy 48 cars for about $1 (
Is a $1 stepping motor).
Of course, I know it will be weaker and less accurate than the standard stepping motor (
When it comes to precision, this is not easy, because most Motors in 3D printers are 200 steps per turn, and 28BYJ48 is about 2048 steps per turn, or even more depending on how you use them, but these motors are more likely to lose the steps and the gears inside are not the best, so it\'s hard to say if they are accurate).
But I\'m sure they will.
At this point, you might say, and so on, there are already 3D printers using these motors, and yes, I know there are actually even very few.
The first is the well-known micro M3D, a small and beautiful 3D printer (
I just like this simple design).
There\'s also ToyRep, Cherry, and there\'s probably more I don\'t know.
So the printers for those motors already exist, but I want to make the difference, more like the code in my own way.
Most people use some open source firmware for 3D printers, but as you may know, if you see my Arduino-based Ludwik drone project, I like to do it from scratch, and make my own code for this printer.
I have developed to read and interpret Gcode from SD card and rotate the motor according to Gcode and Bresenham\'s line algorithm.
A large part of the code for this project is ready.
But in testing, I noticed that the motors were overheating a lot and the speed was too slow.
But I still want to make it, so I designed a frame for it in Fusion360 (
You can find the picture of it on it).
Another assumption in this project is to use a transistor instead of a stepping motor driver.
I found that the transistor has no advantage over the stepping driver: During this time, I bought two new 3D printers, and I kept increasing the printing speed when printing, to print as fast as possible.
I\'m starting to realize the 3D printer with 28BYJ-
48 motors will slow down, which may not be the best idea.
Maybe I should have realized this earlier, but I\'m so focused on the code for this project and learning how the 3D printer really works that I can\'t see this somehow.
Thanks to what I learned by building this thing, I don\'t regret the time invested in this project.
Giving up is not an option for me, I have 5 stepping motors, so I\'m starting to think about how to deal with these parts.
When I buried the old things in the closet, I found that my primary school painting was made with point painting technology, also called point painting (
You can see my picture on it).
This is not a work of art, not even good :)
But I like the idea of creating images with dots.
Here I thought about something I have heard before, in Poland you can find this type of printer in every clinic and they make strange noises: D
It\'s obvious to me that someone must have done something like this, I\'m right, Robson Kuto has done the Arduino dot matrix printer, but to do that, you have to find the perfect component, which can be difficult, but we have 2018 and 3D printing is becoming more and more popular, so why not make a 3D printed version that is easy to copy, but it\'s still similar.
So I decided to make it bigger and even bigger!
In order for it to be able to print on large paper that everyone can buy --
Paper from Ikea :)
Size: 45 cm x 30 m. Perfect!
Designed for a few hours, my project is ready to print, it\'s 60 cm long, too big to print on a standard printer, so I split it into smaller parts, these parts are easy to connect due to special connectors.
In addition, we have prepared a carriage for the marker pen, some pulleys for the GT2 belt, and rubber wheels for the paper (
Also 3D printing with 3D Silk).
But since we don\'t always want to print on such a large piece of paper, I let one of the y-axis motors move so that you can easily adjust it according to the size of the paper.
There are two motors on the y-axis and one on the x-axis, I use micro servo to move the pen up and down.
You can find a link to the model and everything in the next steps.
Then I designed a PCB as always, but this time I decided to order it at a professional manufacturer to make it perfect instead of making it at home to save some time, I heard a lot of good opinions about Safeway so I decided to do so.
I found out they have a scholarship program and thanks to this program you can make your board for free and I uploaded my project to their website and they accepted it!
Thank you so much for making this project possible :)
The board was perfect, but I decided to make an Arduino shield so I could simply use it instead of putting the micro-controller on this board, so it would be easier to weld as well.
The code for Dotter is written in Arduino for sending commands from the computer to the Dotter I use to process.
This could be the whole story of how this project develops, and how it looks now, and congratulate you if you get there :)
It\'s easier now without worrying about it, just build the instructions!
I hope you like this story of the Dotter project and don\'t forget to remember it if you like.
* In the render above you can see the X carriage with 2 pens which is my first design but I decided to switch to a smaller version with 1 pen to make it
But the version with 2 pens can be interesting because you can make dots in different colors and even have a second servo position on the PCB, so this is what dotter V2 needs to consider
What do we need for this project, this is a good question!
If possible, here\'s a list of all the things that have links: The hardest thing for you to get might be 3D printed parts, ask your friends, at school or at the library, they may have a 3D printer.
I can recommend CR10 to you if you want to buy one (link to buy), CR10 mini (link to buy)or Anet A8 (link to buy).
A big part of this project, as I said, is scale, and I want to make it bigger while keeping it simple.
I spent a lot of time at Fusion360 in order to do this, luckily the program is very friendly and I like to use it, so it\'s not a big deal for me.
To install most 3D printers, I split the main frame into 4 sections that can be easily connected due to special connectors.
The pulley of The GT2 belt is designed with this tool (
Cool, look)
: Added DXF files for these two pulleys for reference only, you don\'t need them to make this project.
None of these models require a bracket, and the pulley has a bracket built in because it is impossible to remove the bracket from the inside of the pulley.
These models are easy to print, but it takes some time because they are large.
The wheels that move the paper should be printed with flexible filaments to do better.
I made an edge for this wheel, it should be printed with PLA, on which you can put a rubber wheel.
This step is easy but pleasant.
All you need to do is connect all the 3D printed parts together and install the motor and servo in place.
Finally, you have to put the aluminum rod in the frame of 3D printing with the bracket on it.
I printed a screw on the back of the Y motor holder, which is removable and can hold it in place, but it turns out that the bottom of the frame is too soft, when you tighten the screws.
So I fixed this part with rubber bands instead of this screw.
This is not the most professional method but at least it works :)
You can see the size of the pen I used for this project (
Or more like a mark).
You should use the same size or proximity as much as possible to make it work perfectly with the X compartment.
You also have to install a collar on the pen for the server to move it up and down and you can fix it by tightening the screws on the side.
There is not much to explain, so just look at the photo above and leave a message below if you still need to know something!
You can find the electronic schematic of this project above, if you want to buy a PCB or make it, you don\'t need to worry about the schematic, if you want to connect it on the breadboard, you can use this schematic to connect it.
I tell you that it will be messy on this breadboard with a lot of connections and widgets, so it would be better to use the PCB if you could.
If there is any problem with the PCB or your project is not working, you can solve it with this schematic. You can find .
The next step is the SCH file.
This is probably the best part of this project for me.
I did a lot of PCBs at home but never tried to order from a professional manufacturer.
It\'s a great decision, it saves a lot of time, and the boards are better, they have welding masks, it\'s easier to weld, it looks better, if you want to do something you want to sell, you can\'t do PCB at home, so I\'m one step closer to creating something I can produce in the future, at least I know how to make and order pcb.
You can enjoy the beautiful photos of these boards above, here is the link to Safeway.
ComI has some spare boards so you can buy them on tindie if you want to buy them from me: we have a great PCB, but in order for it to work we have
Don\'t worry it\'s easy!
I only use the THT component so there is no super precision welding.
The components are large and easy to weld.
It is also easy to buy in any electronic store.
Since this PCB is just a shield and you don\'t need to weld the micro controller, we just need to connect the shield to the Arduino board.
If you don\'t want to make a PCB, you can find a schematic of all the connections on it.
I don\'t recommend connecting this on the breadboard, it looks messy and has a lot of cables.
PCB is a more professional and safer way to do this.
But if you don\'t have other options, it\'s better to connect on a breadboard than not at all.
When all components are welded on the PCB, we can connect the motor and servo to the PCB.
Let\'s jump to the next step!
But before that, stop and look at this beautiful PCB with all the components on it and I just love the look of these electronic circuits!
OK, let\'s move on :)
When shield is ready, everything is connected and assembled and we can upload the code to Arduino.
You don\'t have to connect shield to Arduino in this step.
You can find the program in the attachment below.
Here\'s a quick explanation of how it works: It takes data from a serial monitor (Processing code)
Whenever there is 1, it forms a point when there is 0.
After receiving each data, it moves some steps.
When a new line signal is received, it returns to its starting position, moving the paper on the y-axis and making a new line.
This is a very simple program, don\'t worry if you don\'t know how it works, just upload it to Arduino and it will work!
The processing code reads the image and sends the data to the Arduino.
The image must have a certain size to be placed on paper.
For me, the maximum size of A4 paper is about 80 points x 50 points, you get more points if you change the steps of each lap, but the printing time will also be much larger
There aren\'t many buttons for this program, I don\'t want to make it beautiful, it\'s just working.
Please feel free to improve it if you want to improve it!
Final test for Dotter! Dot, Dot, Dot. . . . .
After dozens of points, there was a problem! What exactly?
It looks like Arduino resets itself and forgets the number of steps it takes.
It started fine, but at some point we had a problem.
Is there any problem?
After debugging two days, I found the solution.
It\'s a bit simple and obvious, but I didn\'t think about it at first. What is it?
We will know the next step.
I don\'t want to give up, so I never give up.
I started looking for a solution to my problem.
Last night when I disconnected the cable from Arduino, I felt really hot.
Then I realized what the problem was.
Because I turned on the y-axis motor (
About the coils of those motors)
Since the constant current is very large, the linear stabilizer on the Arduino becomes very hot.
What is the solution to this problem?
When we don\'t need the coils, just turn them off.
Super simple solution to this problem, which is great, I\'m back on track to finish this project!
Is it victory?
My project is finally successful!
It took me a lot of time but my project was finally ready and it worked like I wanted.
Now I feel pure joy because I finished this project!
You can see some of the pictures I printed on it!
There\'s more to print so please keep an eye on and see some of these updates.
This is the end of the build instruction, but not the end of this project!
It\'s open source, everything I share here, you can use to build this thing, feel free to share if you want to add any upgrades, but remember to link to this structure, please also let me know you improved my project :)
It would be cool if someone did that.
Maybe one day I\'ll improve it if I can find the time and post a Dotter V2, but now I\'m not sure.
If you want to know about my project, don\'t forget to follow me on instructures, you can also subscribe to my YouTube channel, because I posted some cool videos here about making hope you have a good day! Happy making! P. S.
Custom message
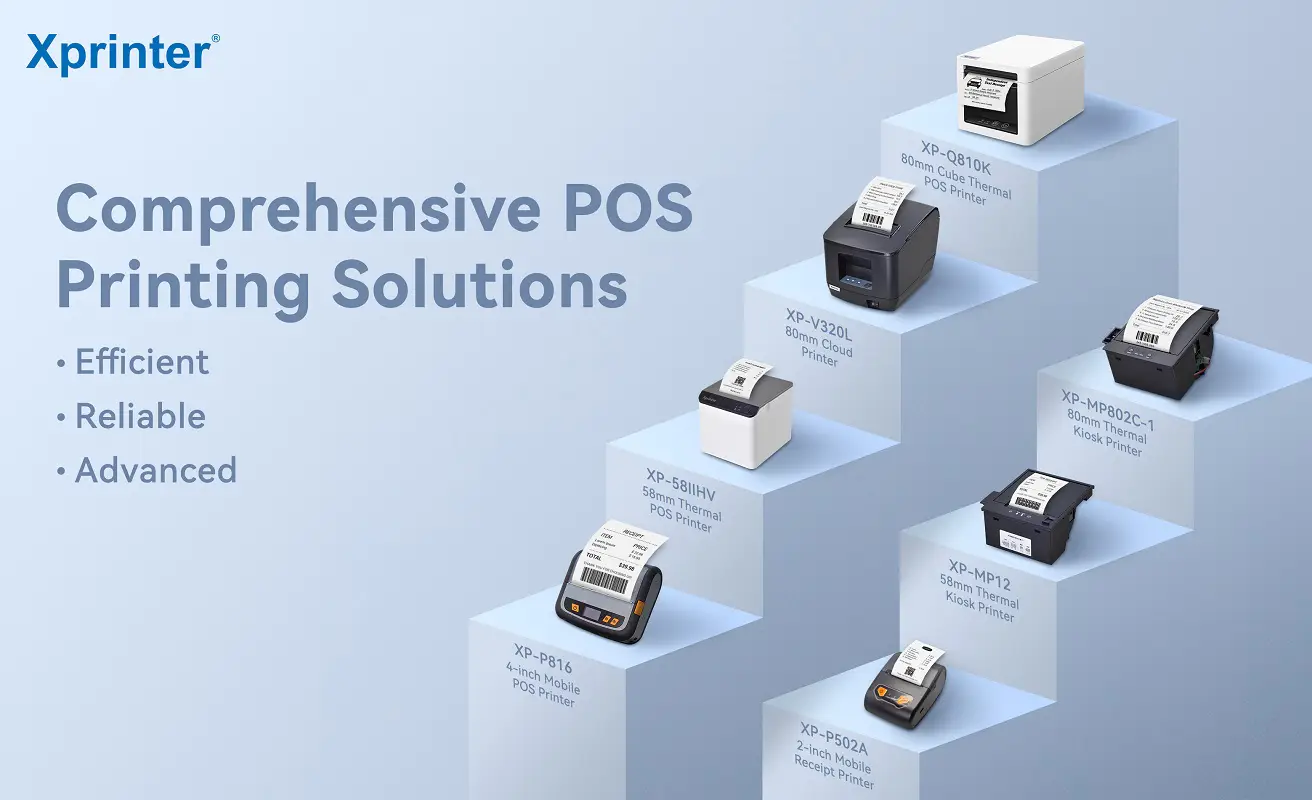
Related Products